Yellow Submarine
Building My First 360 Camera Rig & Other Friends
The leap from capturing 360 imagery to video was vast in 2010, and I wanted to make it easier
After extensive experience creating 360 photos with DSLRs, I was intrigued technologically to solve the problem of 360 video capture.
At the time, there were no commercially available 360 cameras, but people had cobbled together rigs with GoPro cameras.
These DIY rigs were ugly, terribly difficult to operate, and a nightmare for production and post-production.
I decided to build something better, with the goal of traveling and filming locations in 360

Goals
A rig that behaves like one camera with single button operation and a single battery
Built in camera stabilization
Travel Friendly
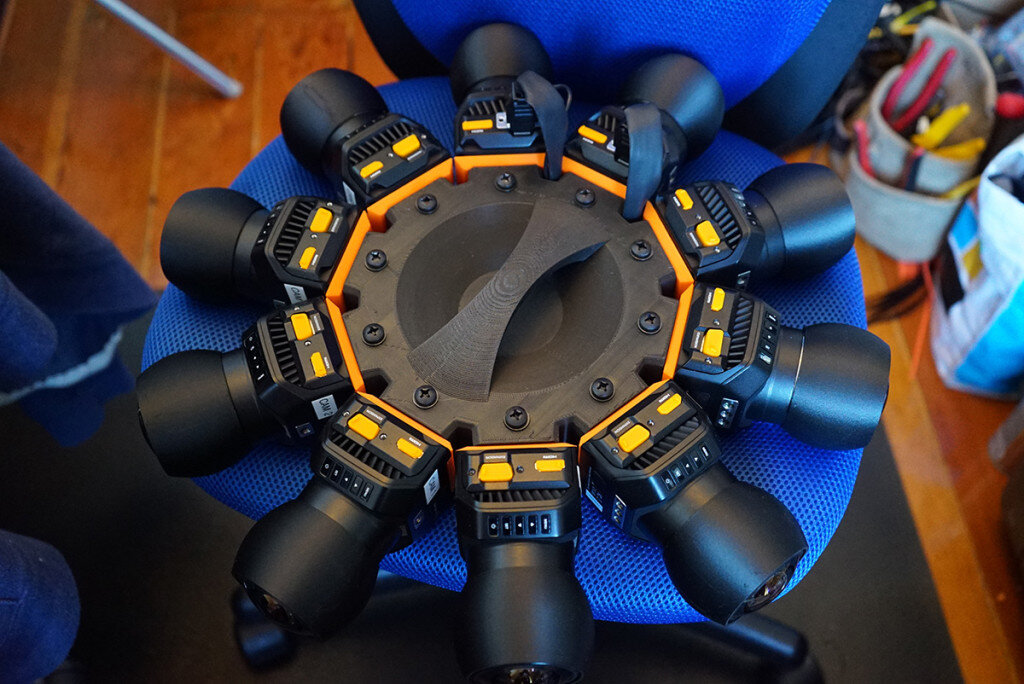
These were lofty goals, given that I had to make 6 GoPro Hero2 cameras behave like one.
Design Process
A. Physical Design

1. Layout of cameras to achieve enough overlap for seamless stitching
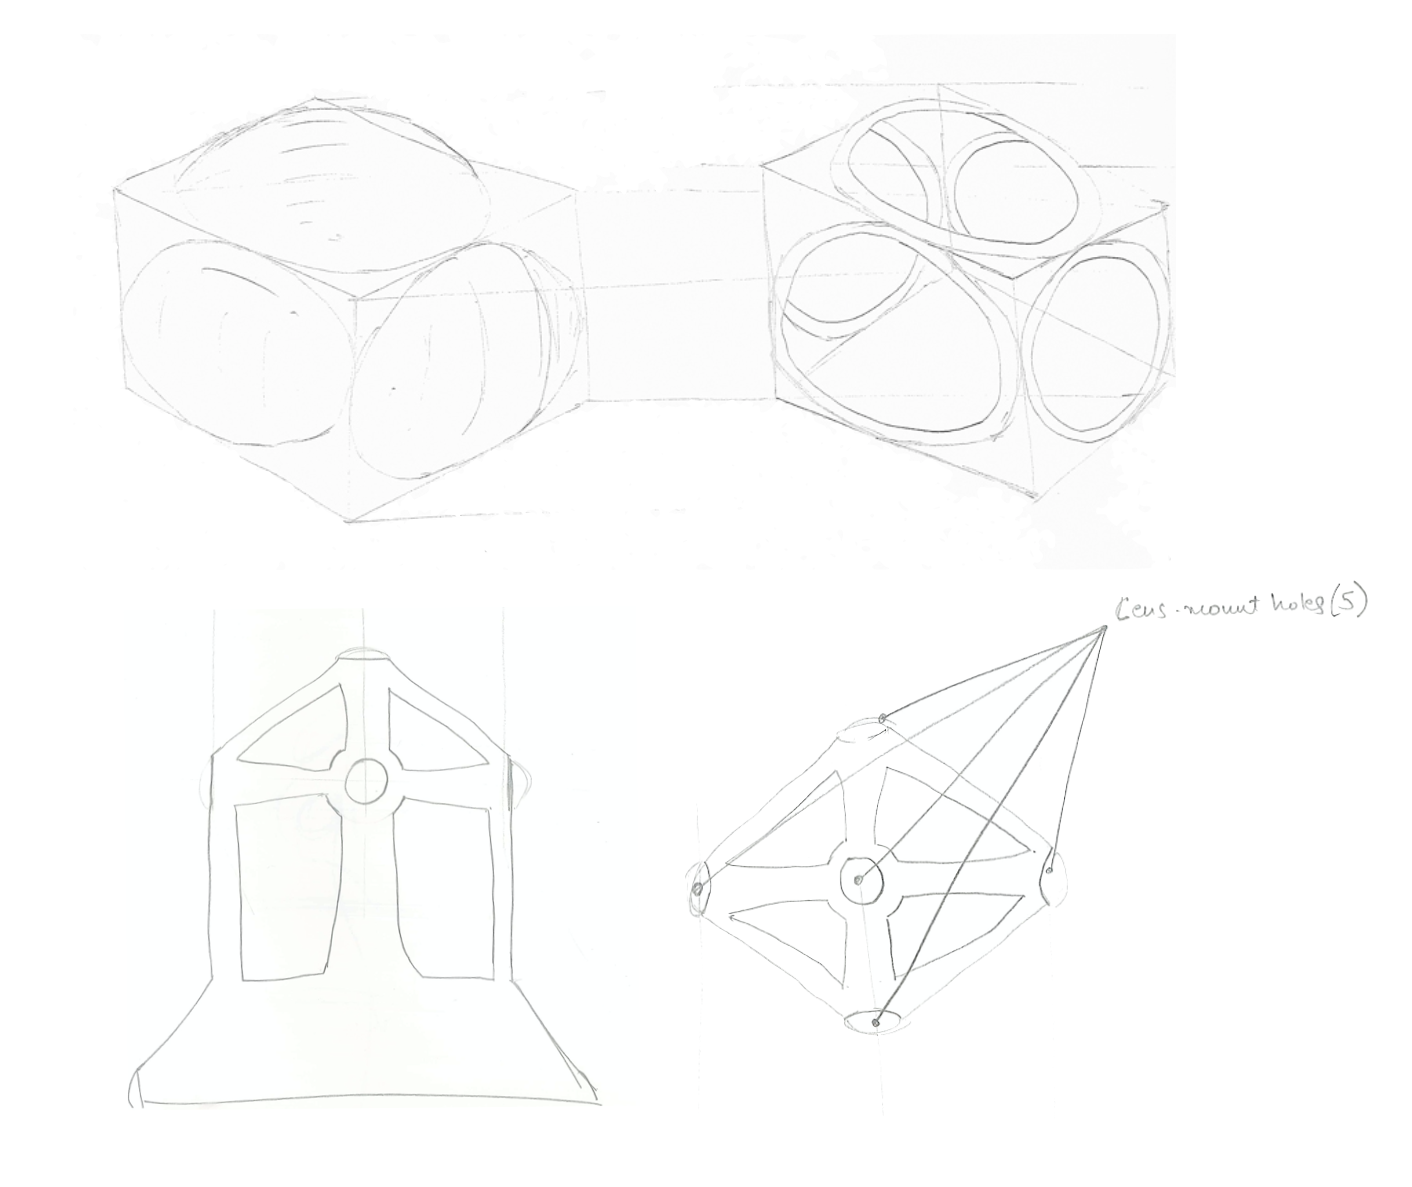
2. Sketch of housing ideas

3. Exploring forms in 3D : Pencil sketch and Solidworks. Settled on the truncated sphere design for both function and aesthetics. Decided to name it Yellow Submarine

4. Applying Constraints : Placing 6 cameras on each face of the truncated sphere, and placement of controller board on the center

5. Trying variations of faces : flat and curved, with access to important camera ports such as USB, SD card

6. Creating a mounting platform for the custom controller boards inside the camera. Test for physical and thermal constraints

7. GoPro mounting on the faces : snap fit v/s rubber bands

8. Single Interface : One of the faces would house the interface board with status LED and On-Off switch

9. Final Checks : water-tightness, wall thickness and clearance checks
B. System Design
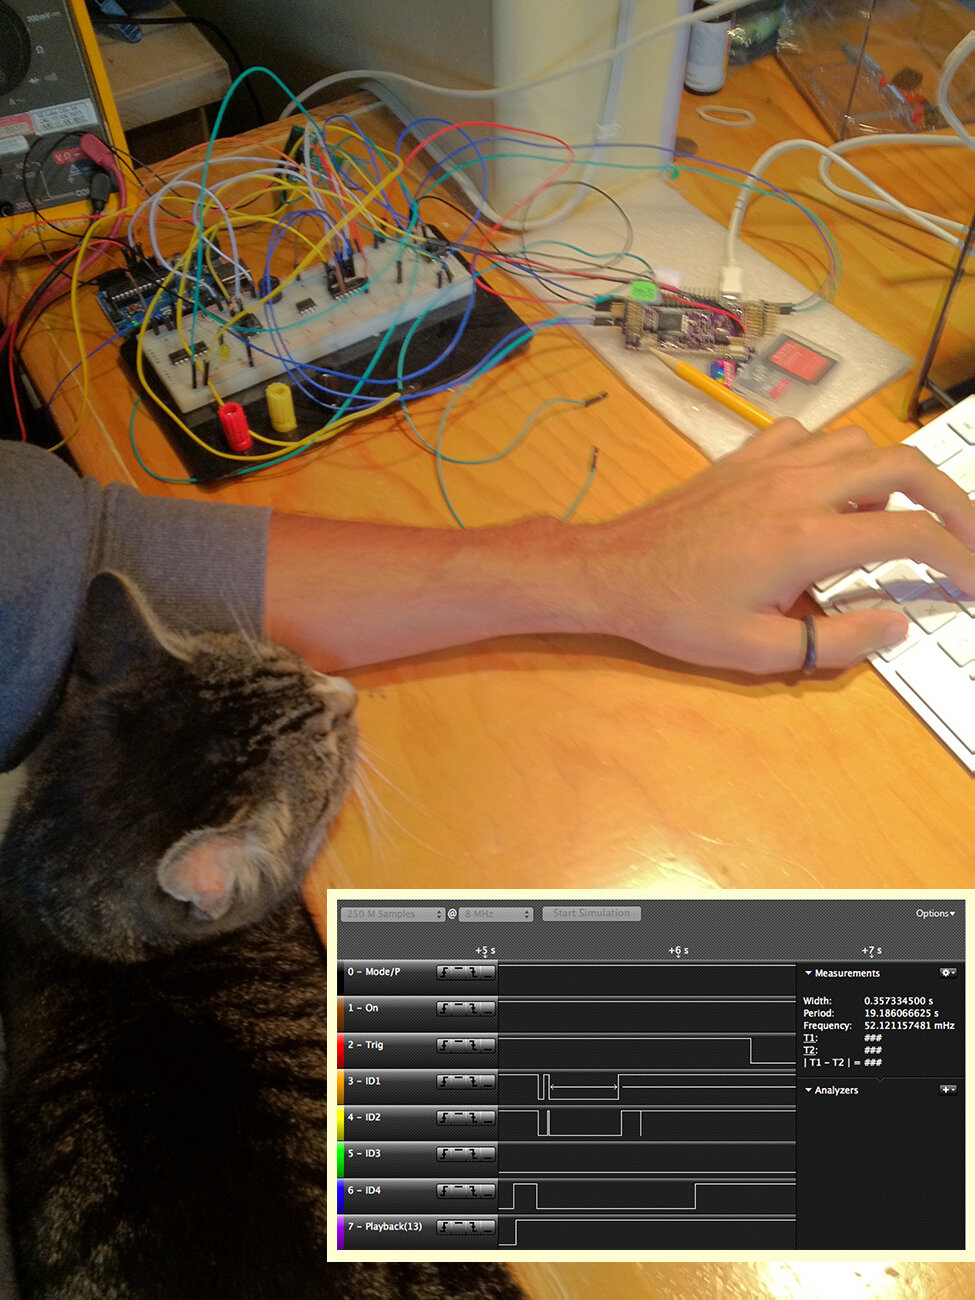
1. Prototyping with a little help from my friends! The basis for the entire circuitry is the ability to control a GoPro from the controller through a port at the back, to which external (proprietary) devices can connect to, and control the camera from. In order to decode this protocol, I used a logic analyzer, and with a bit of help from hacker forums, voila!

2. Controller board PCB layout : An arduino was used to control one one of the GoPros. However, due to signal delays and unpredictability of the internal camera logic, I wasn't able to control all 6 cameras synchronously. The delays would cause the final image to be ‘warped’, i.e. show a noticeable lag in different parts of the image.I borrowed the concept of a ‘clapboard’ from the film industry and integrated a piezo-buzzer (cheap, easy to use) that emits a sharp beep registering on the audio track of all the cameras
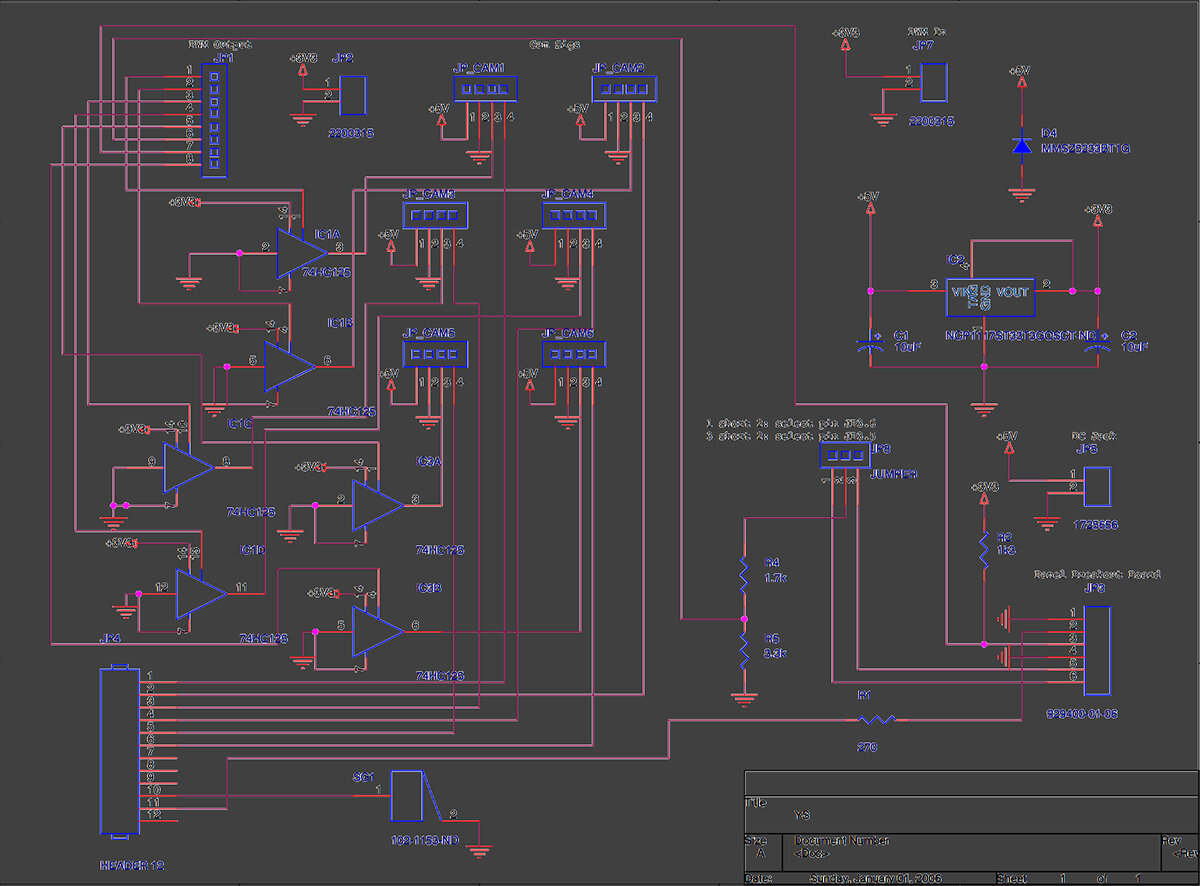
3. Design of the control and power board : I needed to route both power and control signals to each camera. With more than 25 separate signals, and circuitry to step down and stabilize battery power, it needed its own board. Using the single camera controller as the basis, I put together a circuit schematic and its corresponding layout (in Eagle) for two layer board manufacturing. The board had to be same size as the controller board so it could be mounted on top.

4. After the board came back from the fab, they were all tested with 6 cameras and a single power source
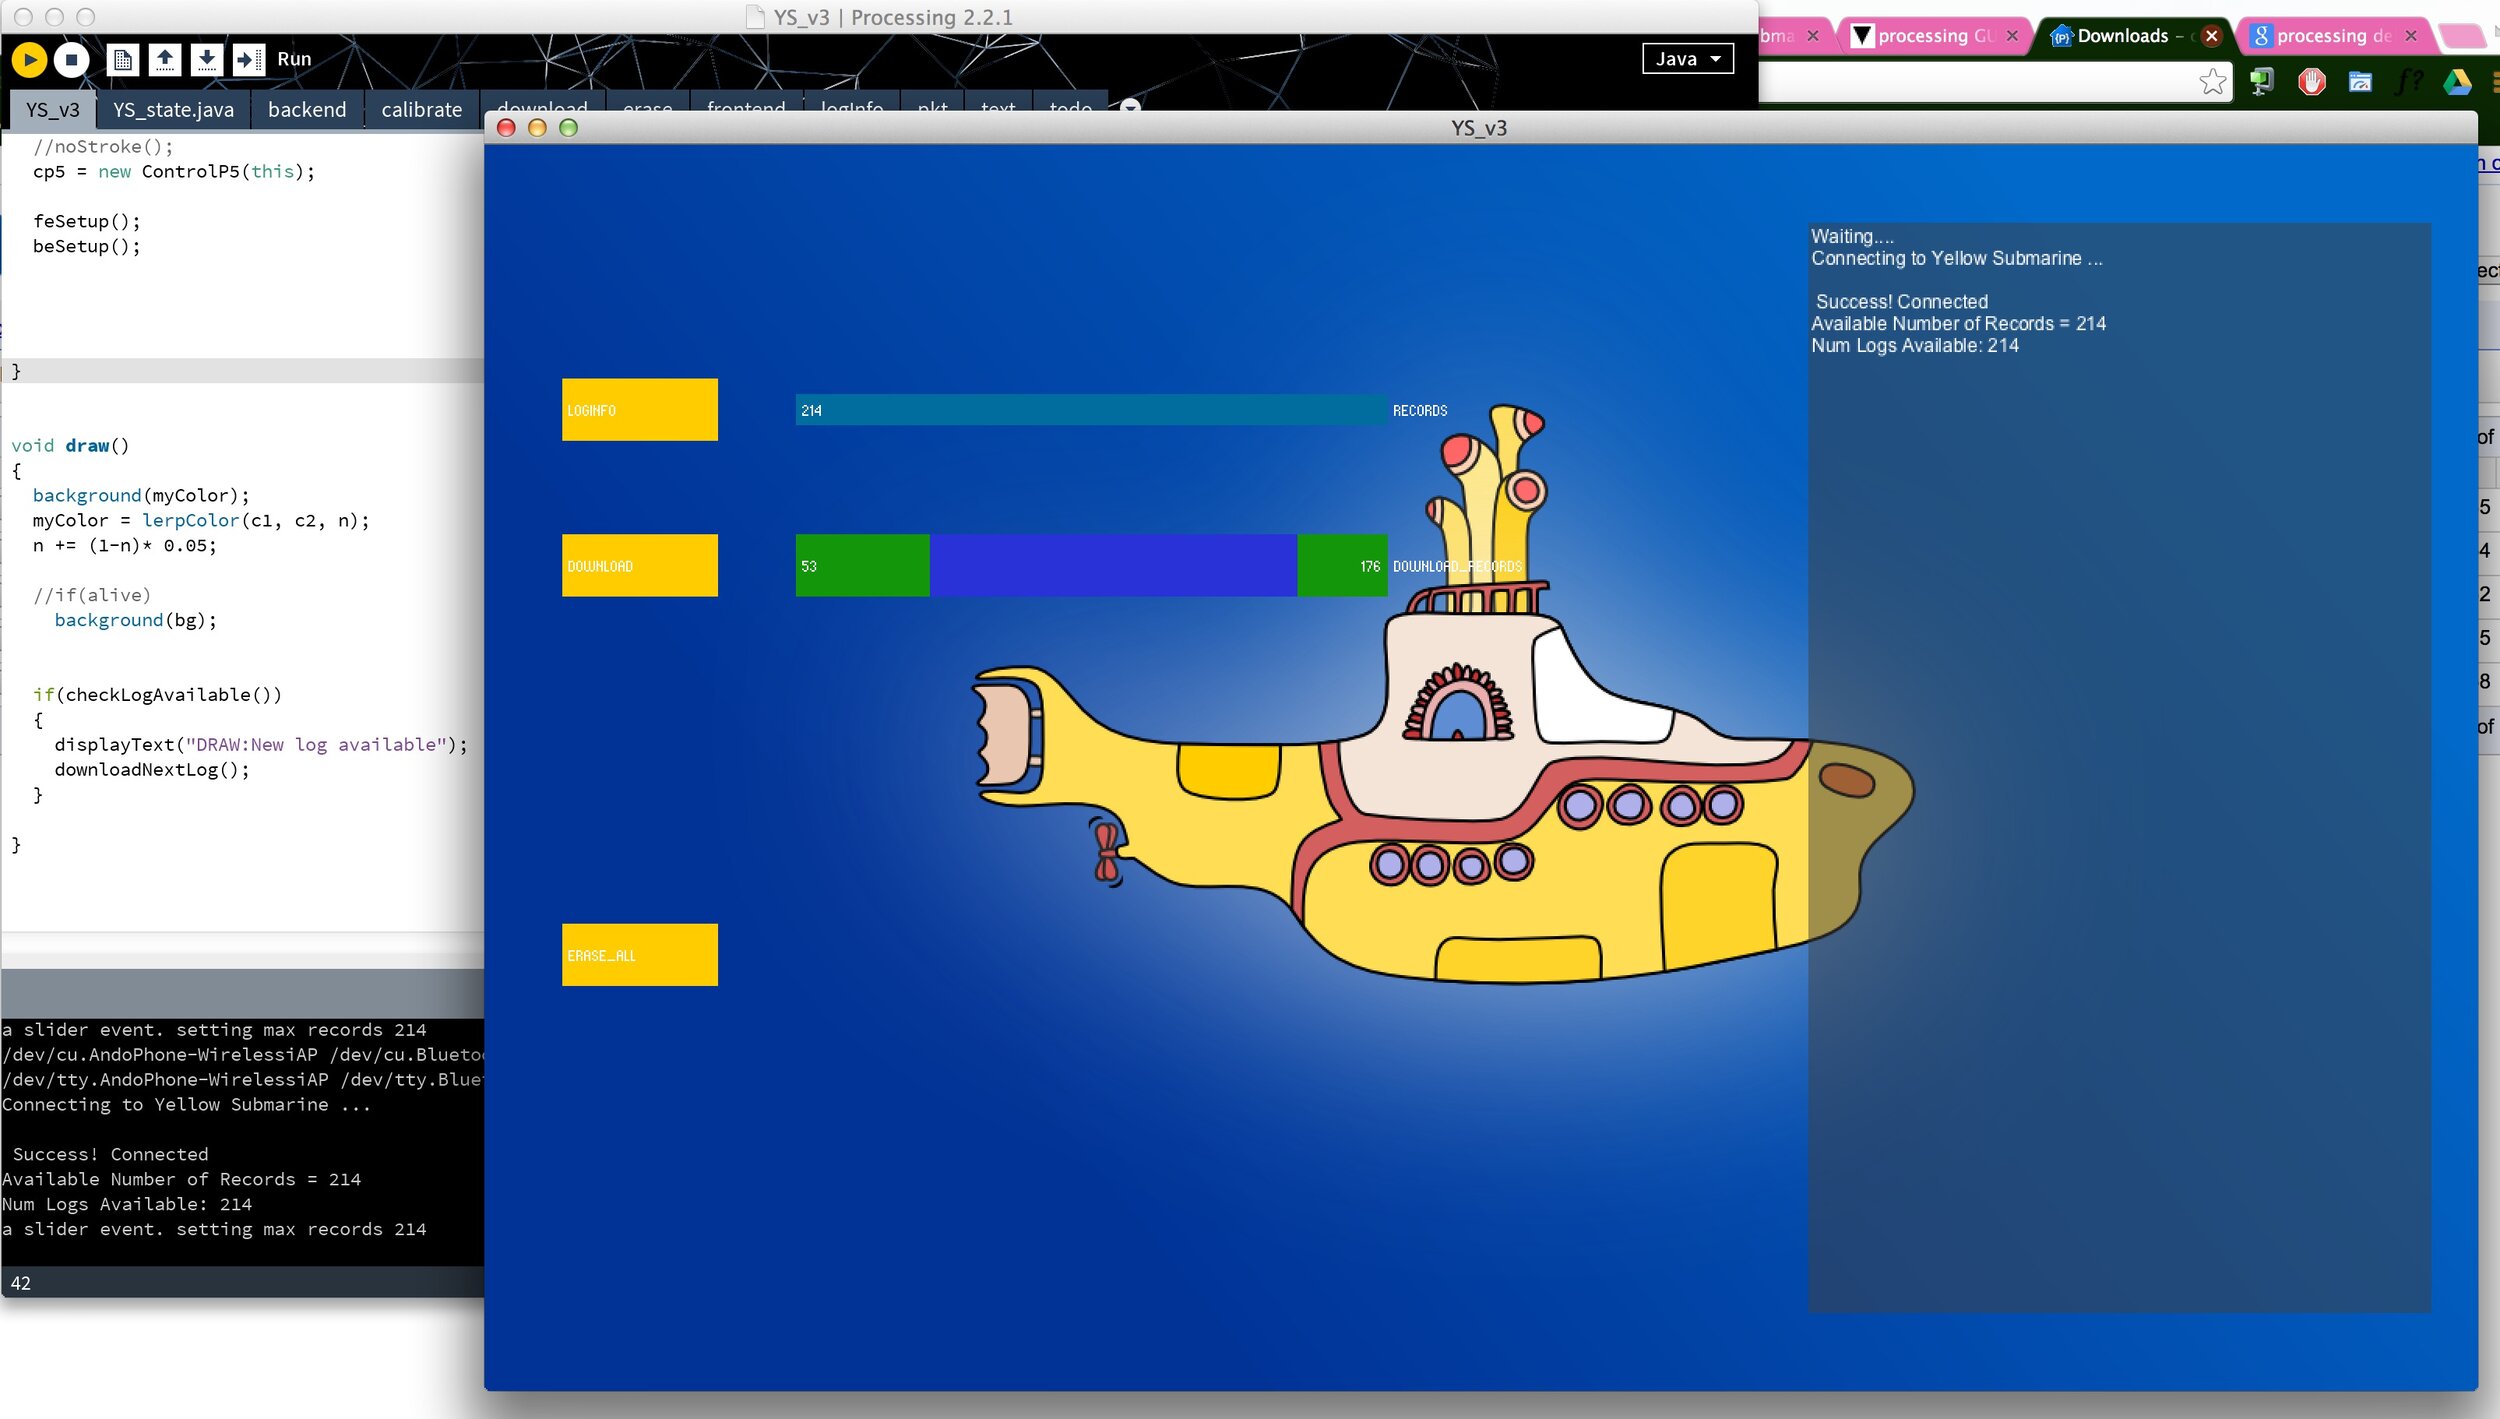
7. IMU Data Acquisition: I created a protocol and an UI in Processing to manage the logging and retrieval of IMU data from the controller board. Using this data, and syncing it to the footage of the camera, one could auto stabilize the 360 horizon. This is a feature in 360 cameras today (circa 2020)

5. Final bits n bobs #1 : I also designed custom boards for connecting to each camera, similar to an iPhone connecter. This was done so as to reduce the final housing volume since the commercially available connectors were too big.

6. Final bits n bobs #2 : I also designed the interface board: it provides USB access to the controller, a digital press button, LED status light and a DC power jack to connect to an external battery pack
Integration + Testing
Footage
I shot a lot of my early live action films with this camera. Below is Vibrations about the aftermath of the double earthquakes in Nepal, 2015